Are you looking to give your old furniture a fresh new look? Transforming your existing pieces can be a cost-effective and environmentally friendly way to revamp your home decor.
One effective method is to darken the wood, enhancing its natural beauty and character. The DIY wood staining process allows you to achieve the desired furniture color transformation with relative ease.
This guide will walk you through the steps to successfully darken your wood furniture, from preparation to the final touches.
Key Takeaways
- Understand the basics of the DIY wood staining process
- Learn how to prepare your furniture for staining
- Discover the different techniques for achieving the desired color
- Find out how to maintain your newly stained furniture
- Explore the benefits of transforming your furniture
Understanding Wood Properties Before Darkening
Before you start darkening your wood furniture, it’s essential to understand the properties of the wood you’re working with. Different types of wood have unique characteristics that affect how they absorb stain and change color.
Different Types of Wood and How They Accept Stain
Various wood types, such as oak, pine, and maple, react differently to staining. For instance, porous woods like pine tend to absorb more stain, resulting in a darker color, while denser woods like maple may require more coats to achieve the same effect.
Identifying Your Furniture’s Current Finish
It’s crucial to identify the current finish on your furniture before applying any stain. This can be done by examining the furniture’s surface for signs of wear, such as scratches or fading, and checking for any existing finish in the grain or pores of the wood.
Setting Realistic Expectations for Different Woods
Not all woods will achieve the same level of darkness. Understanding the limitations of your wood type is key to setting realistic expectations. For example, some woods may not accept stain evenly, leading to a blotchy finish.
The Science Behind Wood Absorption and Color Change
The way wood absorbs stain and changes color is rooted in its cellular structure. The density and porosity of the wood determine how much stain it can absorb, affecting the final color.
| Wood Type | Stain Absorption | Expected Color Change |
|---|---|---|
| Pine | High | Dark |
| Maple | Low | Light to Medium |
| Oak | Medium | Medium to Dark |
By understanding these factors, you can better predict the outcome of your staining project and make informed decisions about the best wood furniture staining techniques to use.
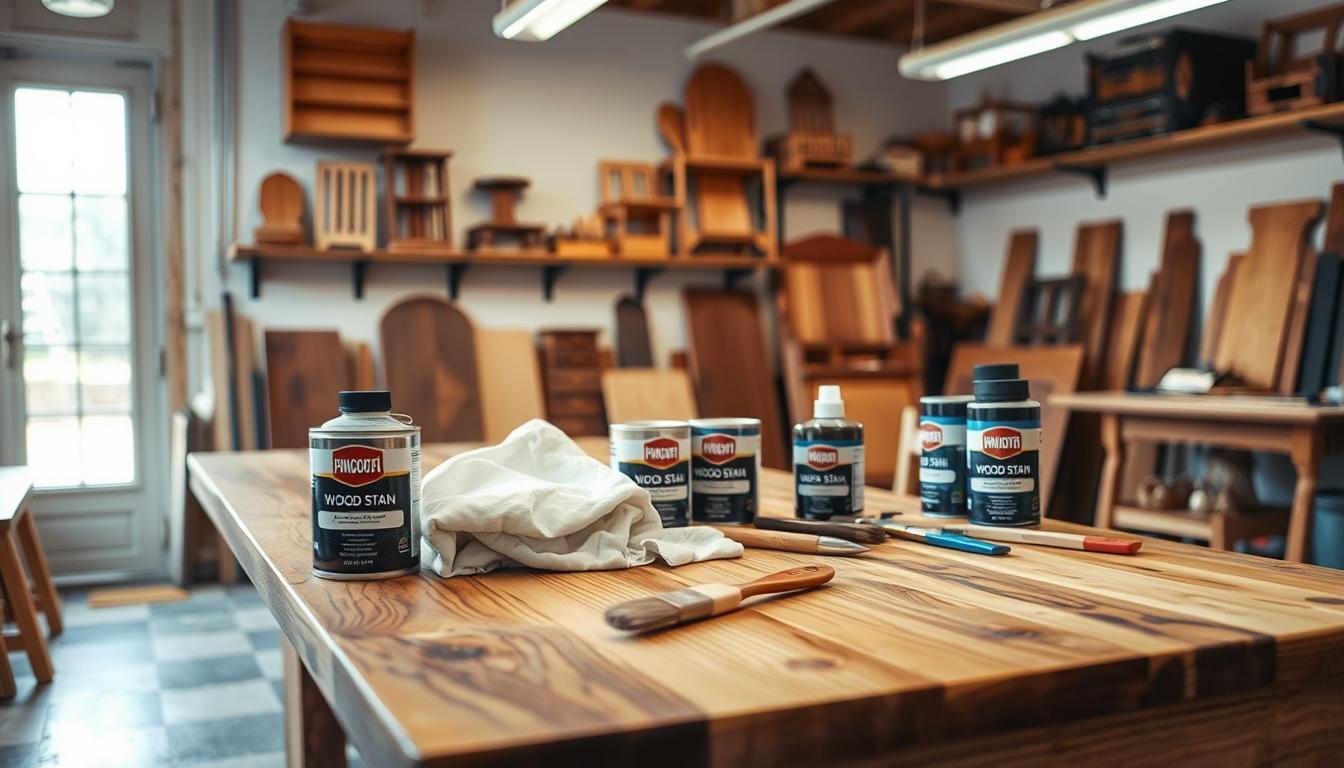
Essential Tools and Materials for Darkening Wood
The key to successfully darkening wood lies in preparing the right tools and materials beforehand. Whether you’re a seasoned DIY enthusiast or a beginner, having the correct equipment is crucial for achieving a professional-looking finish when staining wood furniture at home.
Safety Equipment You’ll Need
Before starting your project, ensure you have the necessary safety gear. This includes gloves to protect your hands from stains and chemicals, safety goggles to shield your eyes, and a mask or respirator to prevent inhaling fumes or dust. Working in a well-ventilated area is also crucial for your safety.
Preparation Tools and Supplies
To prepare your furniture for darkening, you’ll need various tools. Sanding blocks or sandpaper are essential for smoothing out the surface. You’ll also need cleaning supplies like rags and a wood cleaner to remove dirt and old finishes. For more intricate pieces, brushes and cotton swabs can help you reach into tight spaces.
Stains, Dyes, and Finishes to Consider
Choosing the right stain or dye is vital for achieving a darker wood tone. Consider the type of wood you’re working with and the color you’re aiming for. Oil-based stains provide a rich color, while water-based stains are easier to clean up. You may also want to explore wood dyes for a deeper penetration of color.
Budget-Friendly vs. Professional-Grade Options
When selecting tools and materials, you can choose between budget-friendly and professional-grade options. While professional-grade products may offer better results and durability, budget-friendly options can still provide satisfactory outcomes for DIY projects. Consider your project’s needs and your budget when making your selections.
By gathering the right tools and materials, you’ll be well-prepared to tackle your wood darkening project with confidence. Remember, the quality of your materials can significantly impact the final result of your DIY wood staining process.
Preparing Your Furniture for Darkening
The key to successfully darkening your furniture lies in thorough preparation. Before applying any stain or finish, your furniture needs to be properly prepared to ensure a professional-looking result.
Removing Old Finishes Effectively
Start by removing the old finish using a chemical stripper or sandpaper. Chemical strippers are effective but require careful handling and proper ventilation. Sandpaper, on the other hand, is more labor-intensive but safer.
- Use a coarse-grit sandpaper to remove the old finish.
- Apply a chemical stripper according to the manufacturer’s instructions.
- Wipe off the stripper and old finish with a clean cloth.
Proper Sanding Techniques for Even Results
Sanding is crucial for achieving an even finish. Start with a coarse-grit sandpaper (about 80-100 grit) and progress to finer grits (120-150 grit) for a smooth surface.
- Sand with the grain to avoid scratches.
- Use a sanding block for flat surfaces.
- Wipe away dust with a tack cloth between sanding stages.
Cleaning and Conditioning the Wood Surface
After sanding, clean the surface to remove any dust or debris. Use a tack cloth or a damp cloth to wipe down the furniture. Conditioning the wood may be necessary, especially for porous woods, to ensure even stain absorption.
Testing in Inconspicuous Areas First
Before applying stain or finish to the entire piece, test it in an inconspicuous area. This step helps you avoid unwanted color or finish issues.
| Preparation Step | Purpose | Tools/Materials |
|---|---|---|
| Removing Old Finish | Ensure a clean surface for new finish | Chemical stripper, sandpaper |
| Sanding | Achieve a smooth, even surface | Sandpaper (various grits), sanding block |
| Cleaning | Remove dust and debris | Tack cloth, damp cloth |
| Testing | Ensure desired color and finish | Stain or finish sample |
By following these steps, you’ll be able to prepare your furniture for darkening effectively, ensuring a beautiful and professional-looking finish.
How to Make Wood Furniture Darker: Methods Overview
There are various approaches to darkening wood furniture, each with its own set of advantages and challenges. Whether you’re looking to restore an old piece or update your current furniture, understanding these methods is crucial.
Traditional Wood Staining Approach
The traditional wood staining approach is one of the most common methods used to darken wood furniture. This involves applying a wood stain to the surface, which penetrates the wood to varying depths depending on the type of wood and its current finish.
Pros: Easy to apply, available in a wide range of colors, and can be used on most types of wood.
Cons: May require multiple coats, and the final color can be unpredictable if not tested properly.
Using Wood Dyes for Deeper Penetration
Wood dyes offer a deeper penetration into the wood compared to traditional stains, resulting in a richer, more uniform color. They are particularly effective on dense hardwoods.
Key Benefit: Provides a deep, even color that enhances the wood’s natural grain.
Chemical Treatments and Reactions
Chemical treatments involve using specific chemicals to alter the wood’s color. This can include ammonia fuming or other chemical reactions that darken the wood.
Caution: Chemical treatments can be hazardous and require proper safety precautions.
Layering Techniques for Custom Darkness
Layering different stains or dyes allows for a customized level of darkness. This technique involves applying multiple thin layers, allowing each to dry before adding the next.
Advantage: Offers precise control over the final color.
Comparing Methods: Pros and Cons
When choosing a method, it’s essential to consider the pros and cons of each approach. The following table summarizes the key points:
| Method | Pros | Cons |
|---|---|---|
| Traditional Staining | Easy to apply, wide color range | May require multiple coats, unpredictable final color |
| Wood Dyes | Deep, even color, enhances grain | Can be difficult to apply evenly |
| Chemical Treatments | Unique, dramatic color changes | Hazardous, requires safety precautions |
| Layering Techniques | Customizable, precise color control | Time-consuming, requires patience |

By understanding the different methods available for darkening wood furniture, you can choose the best approach for your project, ensuring a successful outcome that meets your expectations.
Step-by-Step Wood Staining Process
With the right tools and techniques, you can successfully darken your wood furniture and give it a new lease on life. The key to a professional-looking finish lies in the preparation and application process.
Applying Pre-Stain Conditioner
Before applying stain, it’s crucial to use a pre-stain conditioner to ensure an even color distribution. This step is particularly important for woods that tend to blotch, such as pine or fir. Pre-stain conditioner helps to create a uniform base that allows the stain to penetrate more evenly.
Stain Application Techniques
When it comes to applying stain, there are several techniques to consider. You can use a brush, cloth, or foam applicator, depending on the type of stain and the desired effect. Always work in the direction of the wood grain to avoid creating unevenness. For a smooth finish, use a high-quality brush or applicator that won’t leave behind bristles or marks.
Building Depth with Multiple Coats
To achieve a deep, rich color, you may need to apply multiple coats of stain. Start with a light coat and gradually build up the color, allowing each coat to dry according to the manufacturer’s instructions. This layering technique helps prevent the stain from becoming too dark too quickly.
Drying and Curing Times
Understanding the drying and curing times of your stain is vital. Drying time refers to when the stain feels dry to the touch, while curing time is when it’s fully hardened. Always follow the manufacturer’s guidelines for these times to ensure a proper finish.
When to Sand Between Coats
Sanding between coats can help achieve a smooth finish by removing any minor imperfections or dust particles that may have settled on the surface. Use a fine-grit sandpaper and gently sand in the direction of the grain. This step is usually necessary after the first coat and potentially after subsequent coats, depending on the desired smoothness.
By following these steps and paying close attention to detail, you can achieve a beautifully stained wood furniture piece that enhances your home’s décor. Remember, patience and the right techniques are key to a successful DIY wood staining process.
Alternative Darkening Methods
Exploring alternatives to traditional staining can lead to unique and stunning results in darkening wood furniture. While conventional staining techniques are effective, other methods can offer flexibility and creativity in achieving the desired darker wood tone.
Using Gel Stains on Previously Finished Surfaces
Gel stains are a versatile option for darkening wood, especially on previously finished surfaces. Unlike traditional stains, gel stains don’t penetrate as deeply, making them ideal for surfaces that have been previously stained or finished. This method allows for a rich, even color without the need for stripping the old finish.
Tinted Polyurethane Applications
Tinted polyurethane is another effective method for enhancing wood furniture color. By applying multiple coats of tinted polyurethane, you can achieve a deeper, richer color while also protecting the wood. This method is particularly useful for those looking to subtly darken the wood tone without drastic changes.

Glazing Techniques for Antique Effects
Glazing is a technique used to create an antique effect on wood furniture. By applying a glaze over a stained or finished surface, you can add depth and character to the piece. Glazing can be used to achieve a variety of effects, from subtle aging to dramatic color changes.
Tea, Vinegar, and Other Natural Darkening Solutions
For those interested in natural or DIY methods, using tea, vinegar, or other household items can be an effective way to darken wood. These methods can produce unique, subtle color changes and are often less expensive than commercial stains. However, results can vary based on the type of wood and the solution used.
By considering these alternative darkening methods, you can achieve a beautifully darker wood tone that enhances the character of your furniture. Whether you opt for gel stains, tinted polyurethane, glazing, or natural solutions, each method offers a unique path to achieving your desired outcome in enhancing wood furniture color.
Finishing and Protecting Your Newly Darkened Furniture
Once you’ve successfully darkened your wood furniture, the next crucial step is to apply a finish that protects and enhances its new color. This final stage is vital in ensuring your furniture remains in good condition and continues to look great over time.
Selecting the Right Topcoat
Choosing the right topcoat is essential for long-term protection and the overall appearance of your furniture. Consider the type of wood, the intended use of the furniture, and the desired sheen when selecting a topcoat. Options include polyurethane, varnish, and wax, each offering different benefits.
- Polyurethane: Durable and water-resistant, ideal for high-traffic areas.
- Varnish: Provides a hard, protective finish and is available in various sheens.
- Wax: Offers a soft sheen and can be used over other finishes for added protection.
Application Methods for Different Finishes
The method of application can significantly affect the final result. Different finishes require different techniques. For example, polyurethane and varnish are typically applied with a brush or foam applicator, while wax can be applied with a cloth or brush.
Always follow the manufacturer’s instructions for the specific product you’re using, and work in a well-ventilated area to ensure safety.
Achieving Different Sheens: Matte to Glossy
The sheen of your finish can dramatically change the appearance of your furniture. From matte to glossy, the right sheen depends on personal preference and the style of your furniture. Most topcoats are available in a range of sheens, allowing you to customize the final look.
Long-Term Protection Strategies
To ensure your newly darkened furniture remains protected, consider implementing long-term protection strategies. Regular dusting and avoiding harsh chemicals can help maintain the finish. For pieces that will be subject to heavy use, consider applying additional coats of topcoat over time to maintain protection.
By following these steps and choosing the right finish, you can enjoy your beautifully refinished furniture for years to come, knowing it’s protected and looking its best.
Troubleshooting Common Issues When Darkening Wood
As you embark on darkening your wood furniture, you may encounter a few hurdles along the way. Despite careful planning and execution, issues like blotchy staining, unwanted color tones, and mistakes can occur. Fortunately, many of these problems can be addressed with the right techniques and a bit of patience.
Fixing Blotchy or Uneven Staining
Blotchy or uneven staining is often a result of the wood absorbing the stain unevenly. To fix this, you can try applying a pre-stain conditioner before reapplying the stain. This helps to create a more uniform base for the stain, reducing the likelihood of blotches. “Using a pre-stain conditioner is a crucial step in achieving an even finish,” says a renowned furniture refinisher.
Addressing Unwanted Color Tones
If you’ve applied stain and ended up with unwanted color tones, don’t panic. You can often correct this by applying a stain with a different tone to counteract the unwanted color. For instance, if the stain has turned out too red, you can apply a green-tinted stain to neutralize it. This process requires some trial and error, so it’s essential to test the stain on a small, inconspicuous area first.
Repairing Mistakes Without Starting Over
Mistakes happen, but they don’t always mean you have to start over from scratch. For minor errors, you can often sand down the affected area and reapply the stain. For more significant mistakes, consider using a wood filler to repair the damaged area before restaining. This can be a bit more labor-intensive, but it’s often less work than completely refinishing the piece.
When to Call in Professional Help
While many issues can be resolved with DIY troubleshooting, some problems may require professional expertise. If you’re dealing with intricate details, complex finishes, or simply feel overwhelmed, it may be time to call in a professional. They can provide the necessary skills and experience to resolve the issue efficiently and effectively.
Conclusion
Transforming your wood furniture into a darker, richer tone is now within your reach. By following the step-by-step guide outlined in this article, you can successfully achieve a darker wood tone that enhances the beauty of your furniture. Whether you’re using traditional wood staining, wood dyes, or alternative darkening methods, the key to success lies in proper preparation and application techniques.
To ensure a smooth finish, consider thinning polyurethane with mineral spirits, as discussed in expert resources like The Wood Whisperer. This technique can help you achieve a professional-grade finish when learning how to make wood furniture darker.
With the knowledge gained from this article, you’re ready to start your furniture color transformation project. By applying the techniques and tips provided, you can achieve a beautiful, darker wood tone that revitalizes your furniture and enhances your home’s aesthetic.